WW2Steel.com
page last modified 4/1/15
(Return to the Main ww2steel page)
Gas Gun Build Manual
Gas Simulators:
This is known in reenacting circles as a 'gas gun'. These are also used by the military for training purposes. For those not familiar with the term it denotes a unit which mixes a fuel (generally propane) and oxygen into a combustion chamber. A small circuit board opens and closes the gas solenoids and times an ignition circuit which fires a spark plug inside the chamber. If the bore is kept clear (just like a firearm should be) this type of simulator is safer than blanks, as no burning powder is expelled. NOTHING CAN BE LOADED INTO THE CHAMBER OR EXPELLED FROM THIS UNIT. This makes it perfect for training, reenactments, living history displays, and movies.
I no longer build gas simulators as it is very time intensive and they can be quite temperamental in the initial setup. I have available here a small manual that helps with the construction of one. It is based on an MG42 build, but the principles can be applied to any auto or single shot gas simulator. To pay for this: simply click the "Donate" link above. It is $14.99. My work frequently has me out of contact and I haven't figured out how to set up a secure link once paid. As soon as I get to my email and see your payment I will email it to you. This may take five minutes, it may take three days. (Usually within a few hours.) Thank you for your patience!
|
The link to the gas gun parts! |
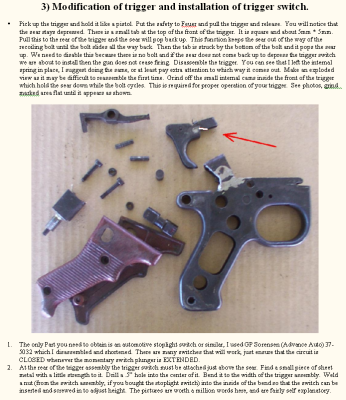
A sample page (half size) on how to modify the trigger assembly.
This manual is 11 pages long. It is printed in relatively small font, so info is really packed into it. The manual covers: (by page)
1) Parts List, (I have worked very hard to make this very complete, at least for the '42 build.), legality
2-3) How to do a realistic MG42 impression. Tons of specific information, from how many people, spare barrels, accessories, etc.
4) Proper use of the simulator. My pet-peeves. (An automatic weapon doesn't give you a force field in a reenactment!) This includes SAFE use of the unit.
5-6) Constructing the combustion chamber on the back of the barrel.
7-8) Modification of receiver, cams, barrel lever. Covers the assault drum and belt versions of the gun.
9-10) Modification of the trigger group (page 9 is shown above).
11) Installation of the ignition coil, grounding, rigging, and methods of carrying (obviously other than a half-track!).
*** Please note that this manual does NOT instruct on how to build the control circuit board or where to obtain the solenoids.
This manual assists with the relatively complex installation of these parts that purchased from Steve (link in the orange box above).
THIS MANUAL DOES NOT MAKE UP FOR COMMON SENSE. It is a guide designed to assist in a complex process. It is YOUR responsibility to evaluate whether you are capable of performing all of the steps and to hire out anything you cannot do. I made this manual to help people build these safely, not to help people build them that are not otherwise capable. Remember always that you are putting very volatile items in very close proximity. (All of this is re-iterated in the manual)
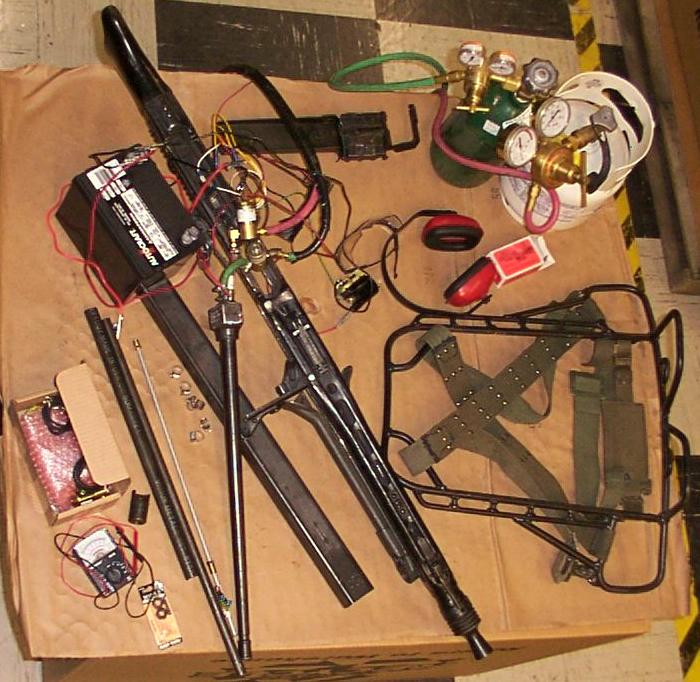
Test firing; this explosion of parts actually worked. You can see the custom pack frame I fabricated. (Sold it, I wonder what ever happened to it.)
The same '42 with the external fittings removed: