WW2Steel.com
page last modified 2/3/15
(Return to the Main ww2steel page)
My Panther project:
Thanks to Aberdeen for allowing me access to the original vehicles!
KEEP CHECKING BACK, I UPDATE WHENEVER I WORK ON IT!
New updates!!!
(Contact information removed because of incessant spam emails. I wish I could line those people up and run them over with a Panther!)
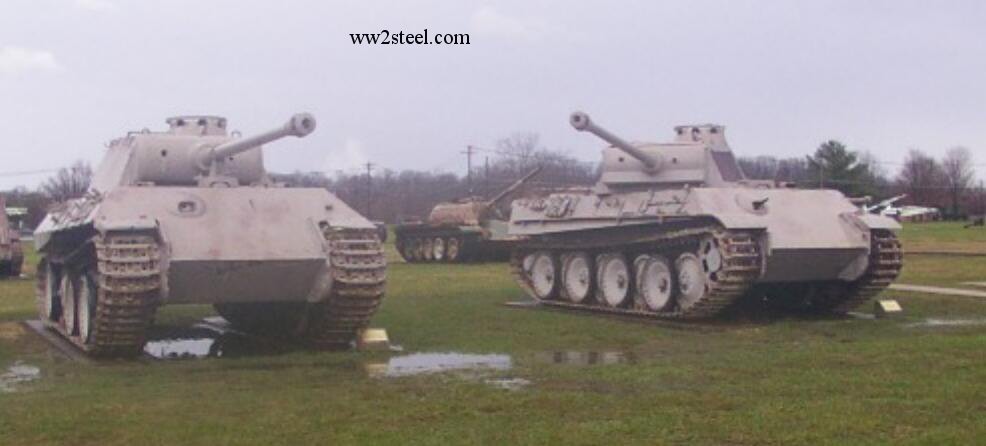
Panther A (left) and Panther G (right) at Aberdeen Proving Grounds in Maryland.
My Goal: To produce a Panther bunker, about 300 of these, and many more based on other turrets, were produced and used by Germany during the defensive phases of the war. Unfortunately (fortunately for the Allies), they were often placed as an afterthought, and as defensive priorities changes, these were often abandoned and destroyed in place.
The "armor plate" will be made of steel, and will stop maybe a .22 at 50 yards at 30 degrees. I am using 11-18 gauge steel on a welded frame. This is for both weight and expense. Steel is getting expensive, as are transport costs, so reducing the amount of steel used is clearly advantageous. (It will not need a wide load permit.) The inside, for both weight and expense reasons will be primarily a functional only arrangement. You will have more room than the original fighting compartment, for better or worse.
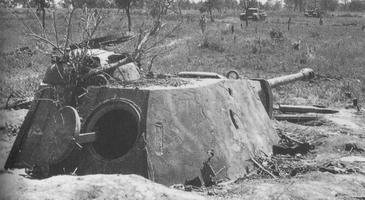
A Panther turret placed upon small subterranean bunker... obviously effective!
Objective 1- Produce an early model turret for use in Pantherstellung setup.
Phase 1- Acquire detailed measurements of the turret, blueprint them. Complete April 9th '05
Phase 2- Select exact production details (cupola type, optics, hatches, etc.) Complete April 14th '05
Phase 3- Acquire materials. Complete April 15th '05
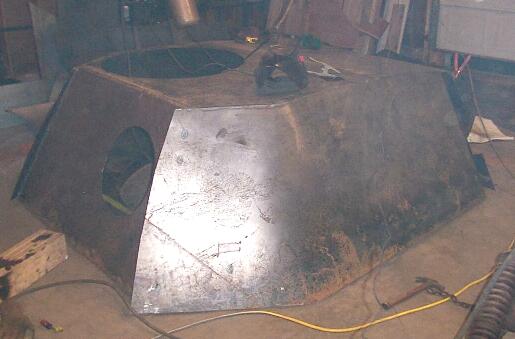
Phase 4- Produce turret body. Very close to finished- still need to make the rear extensions of the rear of the side plates and left side / front plate interlocks.
Phase 4b- Construct turret face and gun cradle. Complete July 4th '05 (Still need the lower guard that goes under the cradle.)
Phase 5- Produce gun mantle. Complete Aug 5th (Need to add cosmetic trim pieces.)
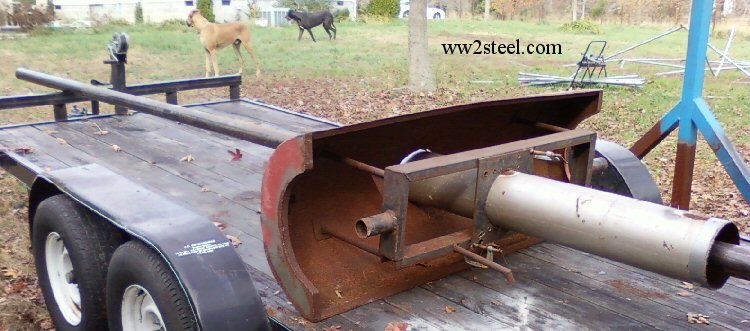
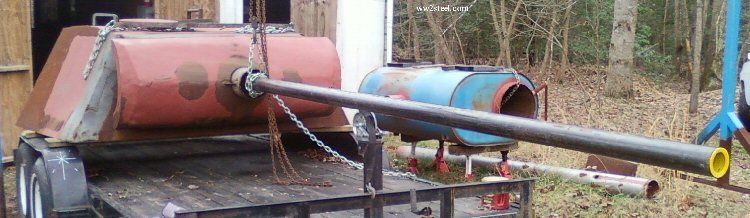
Phase 6- Produce gun barrel. In production, internal bore (pipe) installed Dec'09, planning to weld on tapered sheet steel.
Phase 7- Produce cupola. (Trying to figure out how to make the copy to cast from.)
Phase 8- Produce muzzle brake. (Same as cupola)
Phase 9- Design and construct elevation mechanism. (electric motor with manual backup).
Phase 10- Produce other external fittings. Loader's periscope guard complete 3Jun05
Phase 11- Produce firing simulator, and coaxial gas gun. Have the parts for the coax gas gun, need to install!
Phase 12- Acquire and rig main gun (recoil) hydraulics, pump.
Phase 13- Build light field trailer that allows easy emplacement.
08May05

06Aug05
21Nov'09
01Jan'10
Objective 2- Produce a bunker!
Phase 1- Design, must meet non-wide load requirements. A normal trailer pulled by a heavy pickup will be able to move the turret and bunker. Nearly complete
Phase 2- Construct bunker and install turret!
I went to Aberdeen. The museum staff was very friendly and gave me full access to the top of the tank. Unfortunately the turret is welded shut (did get to see the inside of a Brummbär and Jagdpanther though). I bought some books by Tom Jentz and Hillary Doyle called Panzer Tracts on the Panther (and many other vehciles) which will be most helpful and I highlyrecommend them. I missed him by a day, he came out the following day. It would have been cool to meet him. I am getting a pretty large collection of books, especially on the Panther! Anyway- I got about a million measurements on the Panther A turret mainly (early model turrets on Ostwallturm), and got soaked with rain over about three steady hours. It sucked and was really fun at the same time.
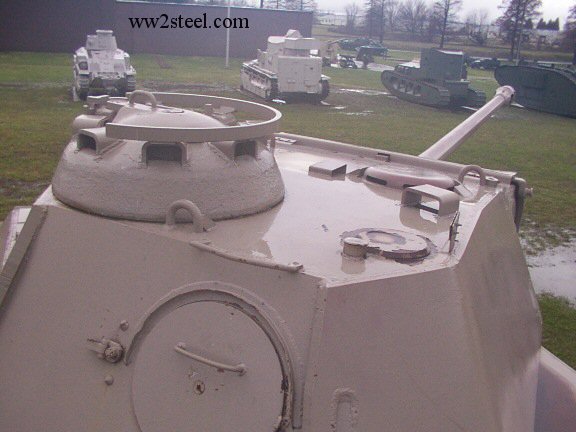
The Panther G turret- note the grenade mortar (nahverteidigungswaffe) on the right rear (the flat, circular item with rust around it).